




How to build a modern TV feature wall with wood veneer slats - better than any media console
Why a TV Wall from Acoustic Panels?
Better sound with zero effort: Flat-screen TVs and soundbars often sound thin and echoey in rooms with bare walls. Panels with a felt backing absorb sound reflections directly behind the audio source - exactly where they cause the most interference. The result: clearer dialogue, warmer bass, less echo. The improvement is noticeable from the first movie night.
A design upgrade in one afternoon: A bare wall with a TV can feel uninspired - a black rectangle on white paint. Panels transform it into an architectural feature that looks like a boutique hotel or high-end interior. The TV becomes part of the overall design rather than a standalone object on an empty wall.
Cable management included: The ~21 mm mounting depth of the panels creates just enough space to route HDMI cables and power cables behind the slats. No more visible cable mess - for many people, this alone is reason enough. The slat structure provides natural channels that hide standard cables completely.
 4 Ideas for Your TV Wall
💡 1. Full wall behind the TV - the classic
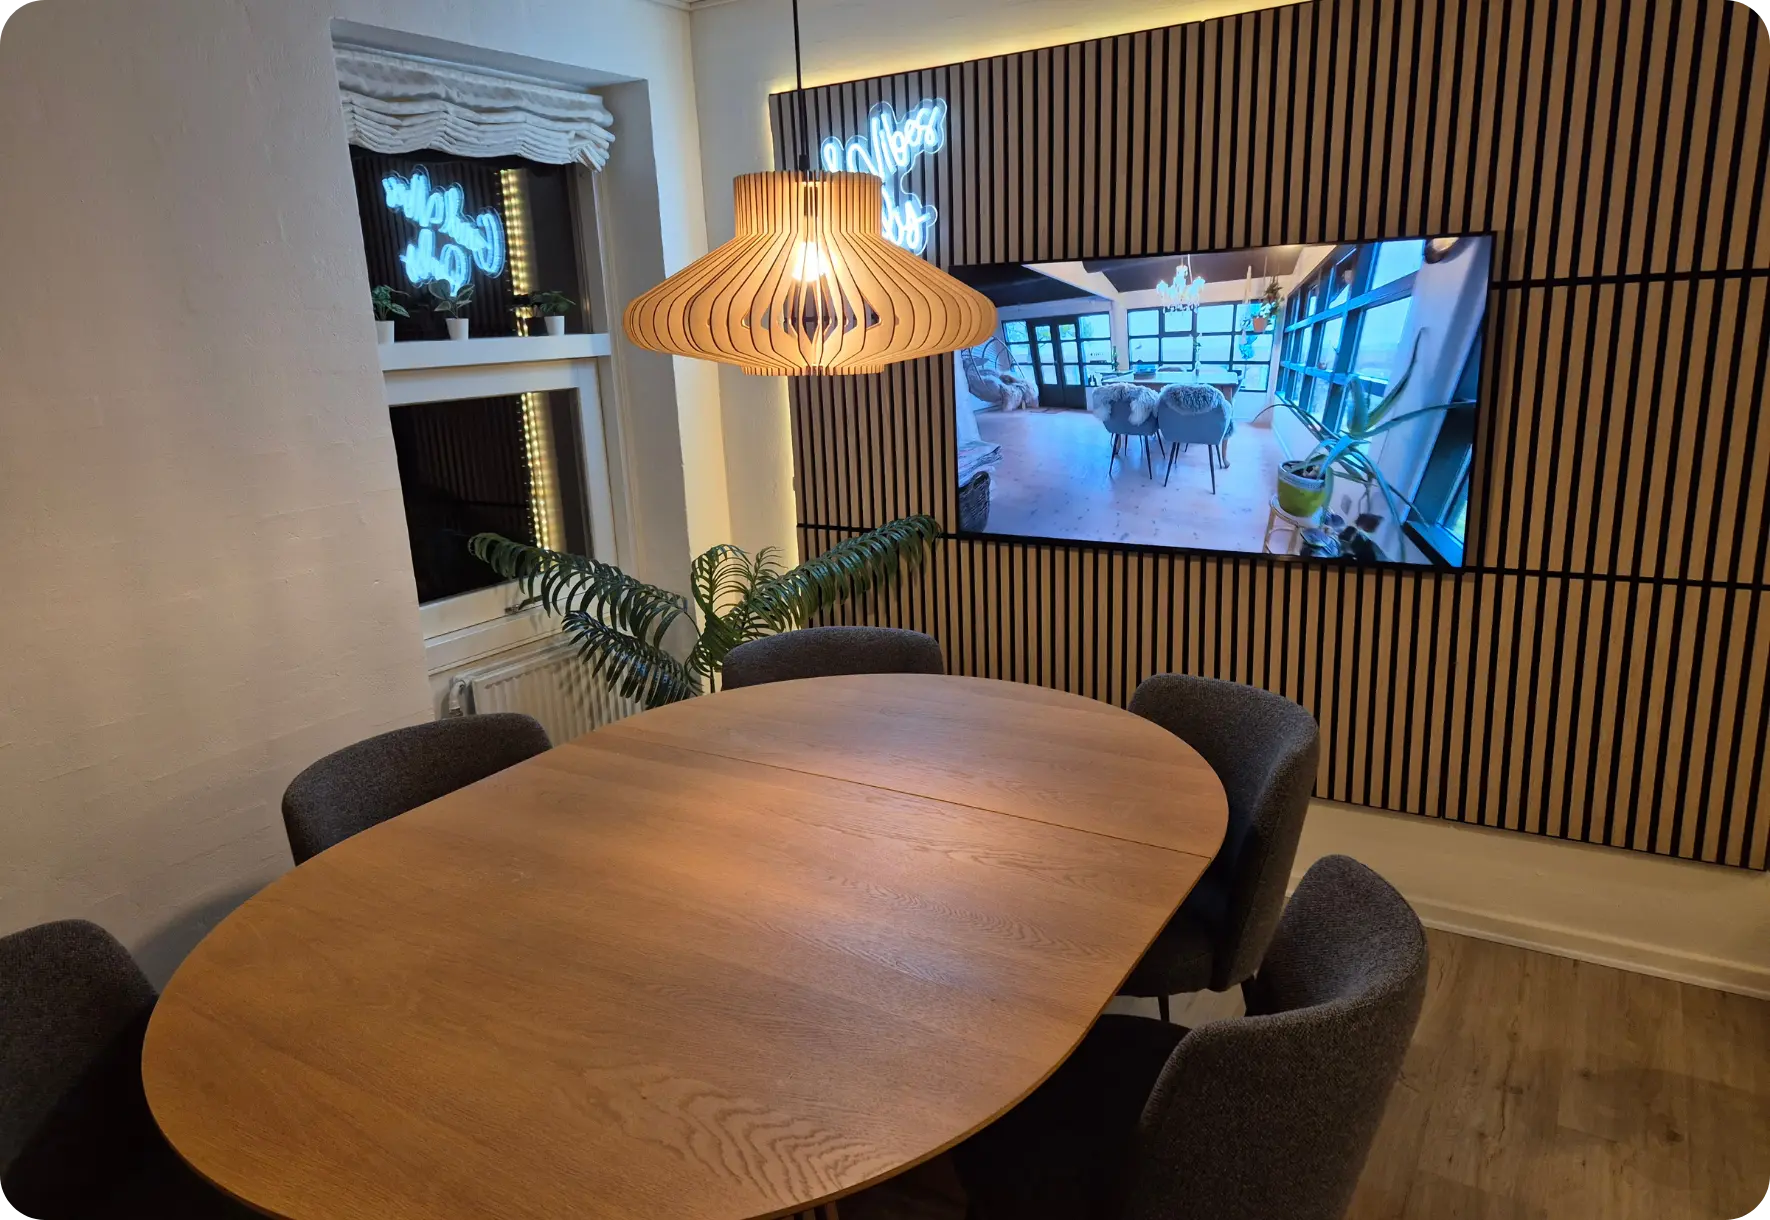
Cover the entire wall behind the TV with panels, floor to ceiling. For a 3 m wide wall: 6 Standard panels (52 cm each). The TV hangs centered on the slat wall. A darker tone works particularly well here - the dark background lets the turned-off screen almost disappear, creating an elegant, monochrome look.
Panels: 6 · Adhesive: 4 cartridges · Screws: optional (90 for concrete)
💡 2. Partial coverage as a frame
Mount just 3-4 panels directly behind the TV - as wide as the screen plus 10-15 cm on each side. This creates a natural frame effect that presents the TV like a piece of art. Especially effective in living rooms with multiple focal points, where a full wall might feel too dominant.
Panels: 3-4 · Adhesive: 2-3 cartridges · Effect: Gallery-like framing
💡 3. TV wall with LED backlighting
An LED strip behind the panels - mounted along the top or sides - creates a halo effect around the slats. During evening movie watching, the indirect light reduces eye strain and creates a cinema atmosphere. The slat grooves cast characteristic light-and-shadow patterns that add depth and texture to the wall. Full guide: LED lighting guide.
Effect: Cinema ambiance + reduced eye strain + dramatic evening look
💡 4. Asymmetric TV wall
Instead of centering the TV, offset it slightly to the left or right. Use the free side for a floating shelf, a plant, or an indirect light source. This breaks the symmetry and creates a more contemporary look than the classic centered setup. A warm mid-tone (Smoked or Light Brown) keeps the space cozy while integrating the TV naturally.
Effect: Modern, editorial look - less "home cinema," more "interior design"
Which Color for the TV Wall?
| Color | Effect | Best for |
|---|---|---|
| Black | Elegant, monochrome - TV blends into the wall when off | Modern, minimalist living rooms |
| Smoked | Warm, cozy - TV integrates naturally into the design | Living rooms with earthy tones, wood furniture |
| Light Brown | Natural, balanced - works with most interiors | Versatile all-rounder for any style |
| Light | Bright, Scandinavian - TV becomes a bold contrast element | Bright rooms, Scandinavian interiors |
 Mounting: TV and Panels Together
Option A - Mount the TV through the panels
This is the most common approach for wall-mounted TVs. Mount the panels first, then drill through them into the load-bearing wall behind. The TV bracket anchors into the structural wall - not into the panel itself. The MDF core of the panels can handle the drill-through, but the actual weight must be carried by the wall behind (concrete, brick, or stud).
Option B - Mount the TV first, then panels around it
Install the TV bracket first, then mount panels on either side. This method avoids drilling through the panels entirely and is slightly simpler. Trim the panels to fit around the TV bracket if needed - a straightforward cut with a jigsaw. More on cutting: cutting guide.
Cable routing
The ~21 mm depth behind the panels accommodates standard HDMI and power cables. Route them vertically behind the slats from the TV down to the floor, where they can connect to a media console, power strip, or wall outlet. For thicker cable bundles, a slim cable channel behind the bottom panel keeps everything organized.
For more extensive cable routing (multiple HDMI, ethernet, speaker wires), a subframe provides additional depth (24 mm+) behind the panels - enough for even the most complex setups.

Materials for a typical TV wall
• Panels: 5 Standard (52 cm) or 4 Premium (60.5 cm)
• Adhesive: 4 cartridges (1 per ~1.5 panels)
• Screws: 75 (15 per panel) - recommended for concrete/brick walls
• Time: 2-3 hours including TV bracket
• Tools: Caulking gun, spirit level, pencil, drill (for TV bracket)
Full step-by-step: installation guide. Renters: no-drill mounting (adhesive only, TV on a stand instead of wall-mounted).
The Sound Difference
A TV wall isn't just visual - it's one of the most acoustically impactful panel placements in the home. The wall directly behind the TV and soundbar is the primary reflection surface for audio. Untreated, sound hits this wall and bounces back, creating muddiness and echo that competes with the direct audio signal.
With panels on this wall, the felt backing absorbs these reflections. The result:
• Clearer dialogue - speech becomes more distinct, especially in movies and series
• Warmer bass - low frequencies feel fuller because competing reflections are reduced
• Less echo - the room sounds tighter and more controlled during movie nights
• Better soundbar performance - soundbars that bounce sound off the wall behind them benefit significantly from absorption on that surface
For more on how acoustic treatment works: how effective are acoustic panels?
Frequently Asked Questions
The TV must always be anchored into the structural wall behind the panels - not into the panels alone. Drill the TV bracket through the panels into the concrete, brick, or stud wall behind. The panels provide the visual backdrop; the wall provides the structural support. This holds securely for any TV size, from 40" to 85".
Yes - noticeably. The felt backing absorbs sound reflections from the wall behind the TV and soundbar, which is the primary reflection surface for audio. Dialogue becomes clearer, bass sounds warmer, and the overall room echo decreases. The improvement is particularly noticeable with soundbars that project sound forward and to the sides.
Darker tones (Black, Smoked) are the most popular for TV walls. A dark background makes the turned-off screen less conspicuous and creates a more harmonious look during evening viewing. Lighter tones work too - the TV becomes a deliberate contrast element - but the darker options tend to be more popular for this specific application.
The slat structure creates natural channels behind the panels. Route HDMI and power cables vertically behind the slats from the TV down to floor level. The ~21 mm mounting depth accommodates standard cables. For thicker cable bundles, a slim cable channel behind the bottom panel or a subframe provides additional routing space.
For a typical TV wall (2.5 m wide): 5 Standard panels or 4 Premium panels. For partial coverage (just framing the TV): 3-4 panels. For a full 3 m wall: 6 Standard panels. Use the size calculator for exact quantities based on your wall dimensions.
Yes - and it's one of the most popular add-ons. A self-adhesive LED strip (warm white, 2700-3000K) along the top or side edges creates a dramatic backlight effect. Install the strip before mounting the outer panels. The slat grooves create characteristic shadow patterns that add depth. Full guide: LED lighting guide.
Conclusion: The TV Wall That Changes Everything
A TV wall made from acoustic panels is one of the best upgrades for any living room: better sound, hidden cables, and a design statement - all from one afternoon's work. No piece of furniture delivers this combination of function and aesthetics. The TV becomes part of the architecture rather than sitting on an empty wall, and every movie night sounds and looks better for it.
Test the look before you commit.
Order a free sample box and hold the darker tones against your TV wall - in evening light, when it matters most.
Free sample box → View all panels →TV mounting through panels requires anchoring into the structural wall behind. Always verify the wall type and load-bearing capacity before mounting a TV. Cable routing capacity depends on cable thickness and panel mounting depth. Acoustic improvements depend on room size, surface materials, and panel quantity. LED lighting requires separate electrical installation.


Leave a comment
This site is protected by hCaptcha and the hCaptcha Privacy Policy and Terms of Service apply.